 how-to
How to Fix Cracked Concrete Driveways: 2026 Guide
Table of Contents
- How to Fix Cracked Concrete Driveways: Step-by-Step Process
- Tools Needed for Concrete Driveway Repair
- Concrete Driveway Repair vs Replacement: Which Makes Sense?
- What Drives the Cost to Repair a Concrete Driveway
- Soil, Drainage, and the Tulsa-Area Cracking Cycle
- Climate-Specific Repair and Long-Term Sealant Care
- Common Mistakes That Shorten a Concrete Driveway Repair
- Frequently Asked Questions
Last Updated: September 13, 2026
How to Fix Cracked Concrete Driveways: Step-by-Step Process
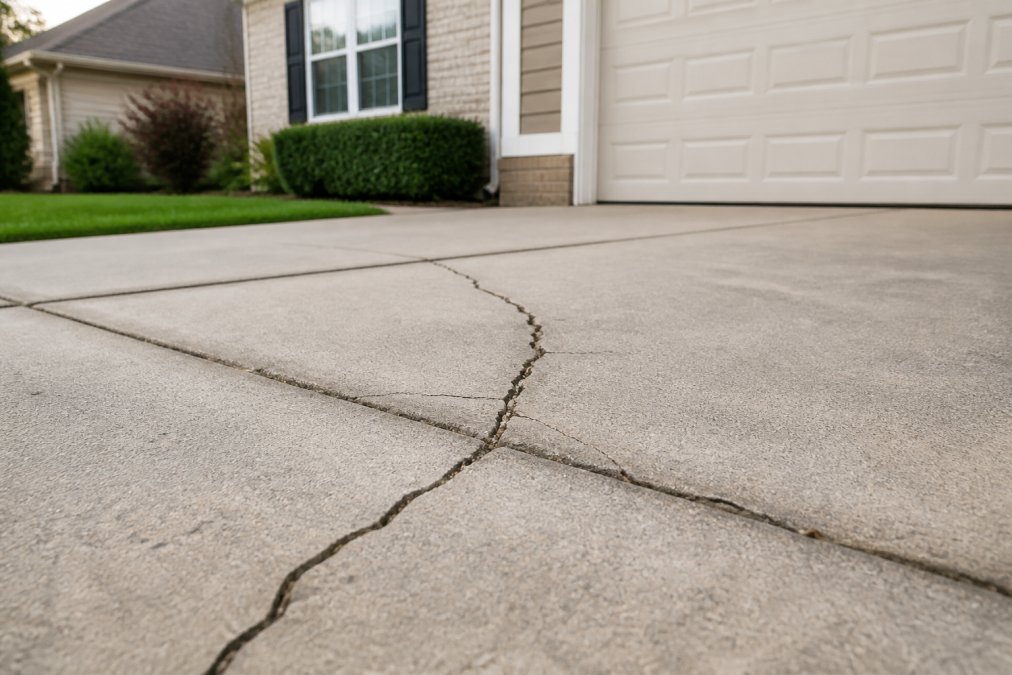
Fixing cracked concrete driveways starts with an honest diagnosis, not a tube of caulk. A hairline crack that hasn't moved in two years is a maintenance item. A widening crack with a vertical offset is a structural warning that no filler will solve. The difference between a repair that lasts and one that fails by spring almost always comes down to what happened before the first scoop of patching compound.
The process below assumes you've confirmed the crack is repairable. If you're unsure, the assessment step will tell you.
Step 1: Assess Crack Width, Depth, and Movement
Measure the crack's width with a tape measure and note whether the two sides sit level with each other. Cracks under 1/4 inch wide and level are usually cosmetic (cement.org). Anything wider, or any crack where one side has dropped below the other, points to sub-base movement underneath. Check the crack at its widest point, not the middle, and press a screwdriver into the opening to gauge depth.
A common mistake is judging by appearance alone. A thin crack running the full length of a slab often signals more than a short, wide one.
Step 2: Clean and Prepare the Surface
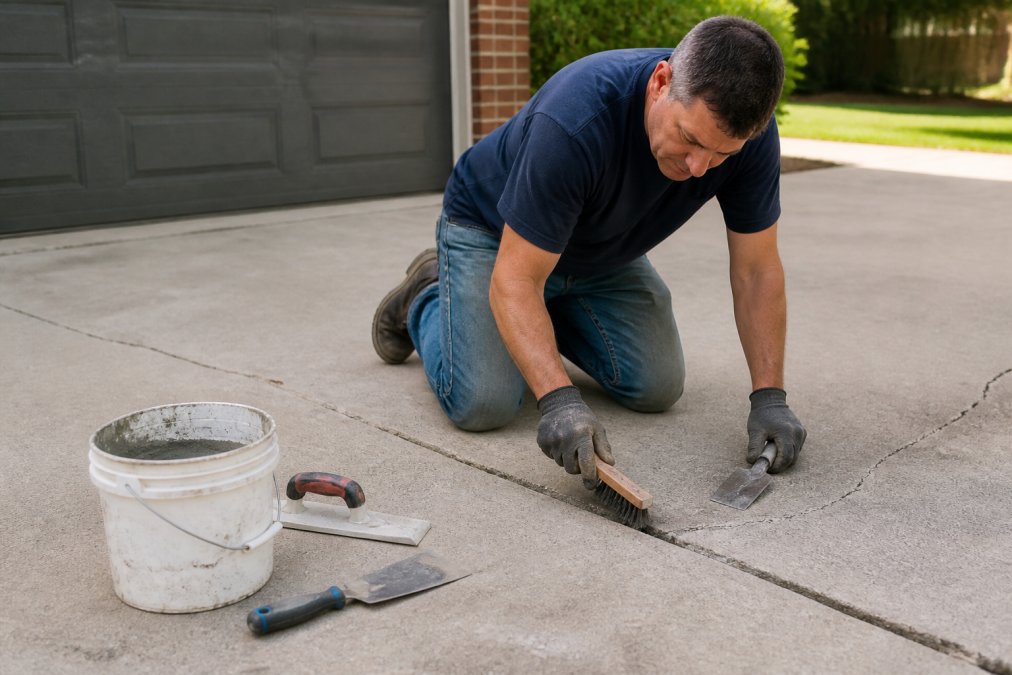
Dirt, loose aggregate, and organic debris stop any filler from bonding. Work a wire brush through the crack to break up loose material, then follow with a pressure washer to flush out dust and grit. Let the crack dry completely, which can take a full day in humid conditions. Surface preparation is where most DIY repairs quietly fail, so don't rush it.
Step 3: Mix and Apply Filler or Patching Compound
Choose your material based on the assessment. For narrow, stable cracks, a pourable polyurethane sealant or concrete caulk works well (concrete.org). For wider or deeper voids, use a patching compound or rapid-set concrete mixed to a peanut-butter consistency. Apply a bonding adhesive to the crack walls first, then pack the filler in with a trowel, overfilling slightly. Feather the edges smooth and let the patch cure according to the product's instructions, typically 24 to 72 hours before traffic.
Tools Needed for Concrete Driveway Repair
The tools needed for concrete driveway repair split into two tiers: what you need for a cosmetic crack and what you need once the sub-base is involved. Buying for the wrong tier is how homeowners end up with a $30 patch that fails and a $400 repair bill they didn't plan for.
Tier 1, cosmetic and mid-width cracks (under about 1/2 inch, no vertical offset):
- Wire brush or stiff-bristle hand brush for breaking up loose aggregate
- Pressure washer (or garden hose with a jet nozzle) for flushing dust and grit
- Caulk gun for pourable polyurethane sealant
- Trowel and a mixing bucket for patching compound
- Margin trowel or pointing tool for feathering edges flush
- Closed-cell backer rod, sized about 25% wider than the crack, for deep joints
- Gloves, eye protection, and an N95 dust mask when brushing or grinding dry concrete
Tier 2, structural or settled cracks:
- Cold chisel and 3-lb hammer to widen and undercut the crack into an inverted-V shape
- Diamond blade (angle grinder or walk-behind saw) if you need clean, square edges
- Hand tamper or plate compactor for compacting any sub-base you expose
- Straightedge or level to check that the patch matches the surrounding slab
- Masonry crack-chasing wheel if you want a uniform reservoir for sealant
Material choices, and why they matter more than the tool list:
- Self-leveling polyurethane sealant, the right call for expansion joints and stable cracks that need to flex. It stays elastic through freeze-thaw movement. Do not use it on a crack with a vertical offset; it will just stretch and tear.
- Rigid hydraulic cement or rapid-set patching compound, for wide, deep voids and spalled edges where you need structural fill. It cures hard and fast, but it will crack if the slab is still moving.
- Epoxy injection, for hairline cracks you want to weld shut structurally. It's thin, it penetrates, and it's overkill for a cosmetic crack.
- Concrete caulk, a low-cost option for narrow, non-moving cracks. It's the weakest of the group and the first to fail in a freeze-thaw climate.
Color-matching, the step most guides skip: New patch material cures lighter than aged concrete, so a fresh repair stands out as a gray scar against a weathered slab. Integral colorant or a concrete stain applied after curing brings the patch closer to the surrounding surface. Match the aged color, not the color of new concrete, the goal is to disappear, not to look new.
Concrete Driveway Repair vs Replacement: Which Makes Sense?
Concrete driveway repair vs replacement comes down to how much of the slab is failing. If damage is confined to a few cracks, spalling at the edges, or a handful of settled sections, repair is almost always the better call. If more than roughly a third of the driveway is cracked, heaved, or crumbling, replacement usually costs less over the next decade than patching the same problems repeatedly (cement.org).
| Situation | Recommended Approach | Why |
|---|---|---|
| Hairline cracks, no movement | Seal and monitor | Low cost, prevents water intrusion |
| Cracks wider than 1/4 inch | Fill with patching compound | Restores surface, limits spread |
| One or two settled slabs | Mudjacking or slab leveling | Cheaper than full replacement |
| Widespread cracking and heaving | Full replacement | Repairs will keep recurring |
| Spalling across the surface | Resurfacing or replacement | Filler can't rebuild a failing surface |
The honest answer is that most driveways fall somewhere in the middle, and a professional assessment is worth more than a guess.
What Drives the Cost to Repair a Concrete Driveway
The cost to repair a concrete driveway depends on crack length, depth, accessibility, and whether the underlying sub-base needs work. A short cosmetic crack costs far less than a structural repair that requires removing and replacing a section of slab. Add-ons like sealing, joint replacement, or drainage correction push the total higher.
The four variables that move the number most:
- Linear feet of crack. Sealant and labor are priced by the foot. A 40-foot hairline crack and a 4-foot wide void are not the same job even though they look similar in a photo.
- Whether the sub-base is involved. If the crack came from settling, the repair includes lifting or recompacting the base, not just filling the surface. That's the single biggest cost swing.
- Access. A driveway with a clear approach lets equipment in. A driveway hemmed in by landscaping, a fence, or a tight turn adds labor hours.
- Finish and color-matching. A patch that has to blend into an aged, decorative, or stamped surface takes more time than a plain gray fill.
Typical scope tiers, so you can sanity-check a quote:
- Cosmetic sealing, narrow, stable cracks cleaned and filled with pourable sealant. Lowest tier; usually a same-day job.
- Structural patching, wide or deep cracks, spalled edges, or a single settled section. Includes crack prep, bonding agent, and patching compound. Mid tier.
- Slab leveling (mudjacking or polyurethane foam lifting), one or two settled slabs raised back to grade. Often cheaper than replacement, and the driveway is usable the same day with foam lifting.
- Partial or full replacement, widespread cracking, heaving, or a failing surface. Highest tier, and the point where patching stops making financial sense.
When repair stops being the cheaper option: If more than roughly a third of the driveway is cracked, heaved, or crumbling, repeated patches usually cost more over the next decade than a single replacement. That's the threshold most contractors use to recommend replacement over repair.
What a written estimate should itemize: linear feet of crack treatment, square footage of patching or resurfacing, whether sub-base work is included, sealant type and brand, color-matching, and a re-seal interval. If a quote is a single lump sum with no scope breakdown, ask for the line items before you sign.
Because pricing varies so much by scope, GatorCrete provides a written estimate after seeing the driveway, so you know what you're paying for before any work starts. That transparency is the whole point.
Soil, Drainage, and the Tulsa-Area Cracking Cycle
Tulsa's clay soil is the root cause behind most recurring driveway cracks, and this is the part most repair guides skip entirely. Clay expands when wet and shrinks when dry, and that seasonal movement pushes and pulls on a slab from below. Add the freeze-thaw cycle in winter, and you get a driveway that cracks, gets patched, and cracks again two years later in the same spot.
Drainage makes it worse. Water that pools along the edge of a driveway or runs underneath from a downspout saturates the sub-base unevenly, which causes settling and heaving. Before you repair, look at where water goes when it rains. If it's pooling against the slab, no filler will hold for long.
Climate-Specific Repair and Long-Term Sealant Care
Climate-specific repair techniques matter more than most homeowners realize. In a freeze-thaw climate, use flexible sealants that can move with the slab instead of rigid fillers that crack when temperatures drop. In hot, dry stretches, keep new patches damp during curing so they don't dry too fast and shrink.
Long-term sealant maintenance is the other half of the job. A quality polyurethane sealant on expansion joints and repaired cracks should be inspected each spring and fall. Reapply when you see it pulling away from the edges or cracking. Sealing the whole driveway every few years also slows water absorption and protects against the milky white efflorescence that shows up on poorly prepped surfaces. GatorCrete handles protective sealing as part of its repair work.
Common Mistakes That Shorten a Concrete Driveway Repair
The mistakes that shorten a concrete driveway repair are predictable, and almost all of them happen before the filler is even opened. Skipping surface preparation tops the list. So does filling a crack that's still actively moving, which guarantees the patch will crack within a season.
Other frequent errors:
- Applying filler to a wet or dirty crack, which prevents bonding
- Using rigid filler on a joint that needs to flex
- Ignoring the sub-base and drainage that caused the crack in the first place
- Patching in extreme heat or cold without adjusting the mix
- Overfilling without feathering, which leaves a raised lip that catches tires
Frequently Asked Questions
What is the cheapest way to fix a cracked concrete driveway?
For hairline cracks under about 1/8 inch, a pourable polyurethane sealant or concrete caulk is the least expensive route. Wider cracks that still show stable edges can be filled with a patching compound. DIY repair costs less than replacement because you are working with the existing slab. If the crack is widening or the slab is sinking, sealing alone will not hold, and a professional evaluation is the smarter spend. GatorCrete can walk you through options before you commit.
What can you put over a cracked concrete driveway?
You have three main choices: a polyurethane or epoxy crack filler for narrow cracks, a troweled patching compound for wider or spalled areas, or a concrete overlay/resurfacer for an entire slab with widespread surface damage. Each product has a different working time and cure window. Match the filler to the crack width and whether the crack is moving. Rigid fillers crack again on active joints, while flexible sealants handle the freeze-thaw cycle better.
Can I pour concrete over old cracked concrete?
Yes, but only if the existing slab is structurally sound and the cracks are not caused by sub-base failure, settling, or heaving. The old surface must be cleaned, roughened, and coated with a bonding adhesive before the new layer goes down. If the slab is moving, a thin overlay will crack along the same lines within a season or two. A contractor should confirm the sub-base and drainage first, since pouring over a failing slab wastes the new material.
How do I know if my driveway needs professional repair or replacement?
Repair makes sense for isolated cracks, hairline fractures, and surface spalling on a slab that is not moving. Replacement is the better call when cracks are wider than 1/4 inch, multiple slabs have shifted, there is visible heaving or settling, or the damage keeps returning after repairs. A professional inspection looks at crack width, slab height differences, and drainage. GatorCrete can assess your driveway and give a straight recommendation on repair versus replacement.
Cracked concrete driveways rarely fail because of bad filler. They fail because the soil, drainage, and slab movement underneath were never addressed. GatorCrete brings GATOR TOUGH craftsmanship to every repair, from crack assessment and surface preparation to protective sealing that stands up to Oklahoma's clay soil and freeze-thaw swings. If you want a straight answer on whether your driveway needs a repair or a replacement, get a quote from GatorCrete and we'll tell you exactly what we see.